So you can solder up a perf board with resistors and capacitors and make your pedal sound amazing. But whats the next step.... pedal finishes! This is exactly how I feel. I've built about 5 or 6 pedals and I'm really getting around to doing a good job of it. But when I go on these DIY guitar pedal forums, I see these professionals that have amazing graphics on their pedals. If you spend time on these forums you'll notice a lot of talk about "Powder coating", this is the preferred method by boutique builders and big companies. There are thousands of articles about powder coating on the internet, but I could never find a good article about spray painting pedals. In my mind, spray painting was the easiest way to achieve a nice finish and at the end of this page you might see that it does a decent job of doing so. Before you start spray painting make sure you finish all your drilling because it you drill after you paint, you might damage the finish.
Here is how I spray painted my metal enclosure with spray paint:
1. Buy the spray paint you want
Usually when you build a pedal, you have an idea what the graphics or finishes might look like. There are thousands of different kinds of spray paints, I just went to my local hardware store. I didn't really want to just have a solide colour. Instead I I got this really cool HAMMERED paint by Rustoleum.
I got it in a Rosemary colour because it had the most detail. If you look really closely to the picture below, you can see that it's got a really neat looking texture to it. Now I warn you, if you want to use this paint, or and other hammer tone paint, it's a lot more difficult to apply and get the results you want, I'll explain more on the tips of spray painting with specifically this kind of spray paint.
2. Find a space that is well ventilated
I'm sure we all hate the smell of spray paint so if you can, SAVE YOUR SELF AND SPRAY PAINT OUTSIDE! Sadly I could not spray paint outside because the paint can says that it needs a temperature of 10
°C so I needed to spray paint in my workshop because it's wintertime in Canada! If you do paint inside, at least find a window you can open.
3. Prep the enclosure for painting
This step is very important because you need to roughen up the enclosure so that the paint can stick onto it. This step is very simple, you just need 3 things, low grit sand paper, higher but not super fine grit sand paper, and a wire brush. I you want you really only need sandpaper but the wire brush helps. If you are going to use all of the go from left to right in terms of order, heavy sandpaper to start and wire brush to finish. Make sure to do one side at a time. When you are done this step, go to your sink and wet the enclosure. Use soap and lather it everywhere you roughened up. This will help get rid of al the really small metal particles stuck in the grooves. If you don't do this step, the paint will have a hard time sticking on.
4. PAINT
I strongly suggest that you start with the back plate of the enclosure. This will be your kinda practice run because it's only the back, you won't see it often. I'm sure we all know how to spray paint, point and shoot. Always read the label of the can, it might have some helpful tips for the paint. Generally you want to start with a light base coat. A couple sprays back and forth will do it. On these sprays, don't go slow, go at a moderate passe. Then, just leave it over night. The next day once it is dry, go for the second coat. This time you have a choice for it to be the final coat or just another one. I suggest that you go for another light coat and let it dry overnight. Now for the final coat. For this particular paint specifically, go slow when you are moving across. This hammer tone paint is weird, very unpredictable. So go slow when applying the final coat, don't be afraid if it's thick, it'll just take time to dry. With this paint I noticed that I wasn't happy with the look of it on the third coat, so I just sprayed more on it. I maybe sprayed 5 coats on it before I was happy with the result.

If you look really hard you can see the really cool texture of this paint
Now that you have the back plate done, it is time to paint the full enclosure. I used a piece of wood to hold it up. With this paint you really want to spray downwards. If it is not sprayed down, the texture won't be the same. So as you can see with these pictures I've made it so the enclosure is almost flat.
I did the face of the enclosure last because it was the spot that I would see the most and I would of had the most practice.
I pretty pleased with the sides of the enclosure
The drying process. As I said, spray paint on a flat surface so you spray downwards. once you are done that coat, let it sit for about 30mins to an hour. At this point it will still be tacky but the texture will be solidified. to accelerate the drying you can use a fan like in the picture below.
If something looks dry, it isn't always completely dry so be carful. I made this mistake and left a noticeable fingerprint, don't make these sad mistakes
In the cardboard box that I spray painted in, to the side of my wood block, the extra paint dried and make the coolest thing ever. I really wish that my whole pedal could have turned out this way
Because I wasn't happy with the finish of the face of my enclosure, I decided to do another coat. This time I think I got something amazing!
Just look at that texture!
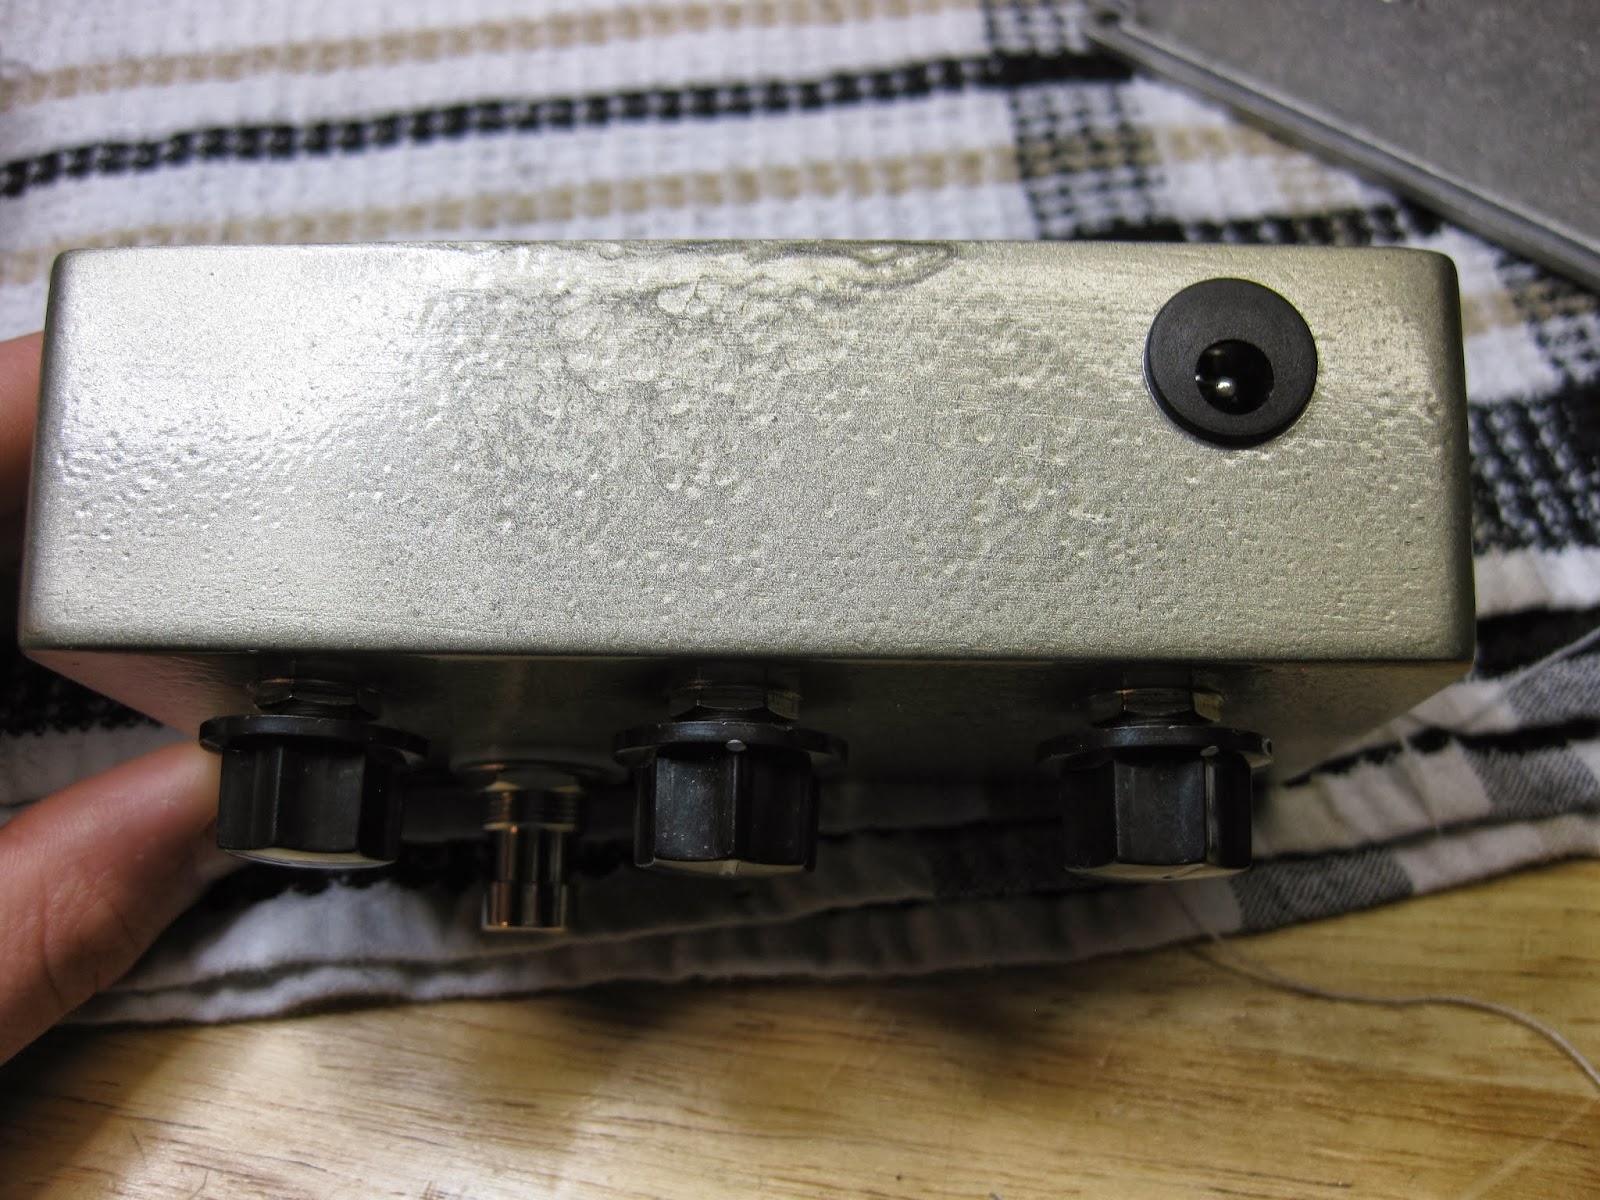
Last thing, because you now have a frickn' sweet looking pedal, you don't want to damage the finish. So when you do your offboard soldering, make sure to have some kind of cloth under you pedal. This will make sure your finish is nice and clean.
Hope you benefited from this post and may your metal enclosure finished be sweet!

 I always start with soldering the LED first
 Then the power and ground. For me it is always a chalenge to fit two wires in the small lugs of the power jack. What I like to do is twist them as small as I can then put them both in at the same time.
 I feel like I could have done a better job soldering the 3PDT switch but it works just fine.
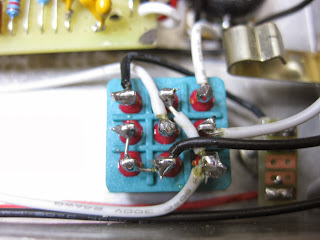 Here I have the small board for the LED. This board holds the resistor for the LED. I made it as small as possible so it would fit anywhere.
 And since a lot of the ground is connected to the jacks, I do that next. As you can see I usually always have the ground connections with black wire just for a visual representation.
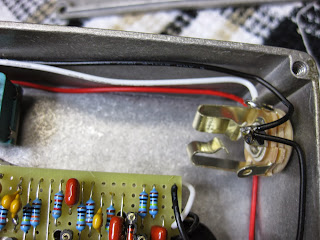
 It's always really hard to fit both wires into the small hole but I did it. Since the second red wire goes to the LED. Next time I'll just solder another wire to the board where the 9v is coming in


 Hope this help a little bit!